How to Auto-Mount a Drive at Boot in Linux
Partitioning a drive is very useful for organizing your data and workflow. Chances are that you also have multiple partitions/drives on your system.
Now suppose you have a drive with data that you need to access frequently. OR your Steam Library is in one of your drives. So, whenever you boot into your system to access that data or to play a game, you will have to mount that drive partition manually.
Setting your drive to auto mount on every boot In these cases will save your precious time and hassle.
Auto mounting a disk is very easy to do in Linux, you either do it via the command line or via a GUI tool. Here is a simple step-by-step guide to perform this in your favorite Linux distribution.
Auto Mount Drive at Boot in Linux using fstab
fstab (or /etc/fstab) is a file used by Linux system to manage drives, swap, efi and other partitions that needs to start with the system.
If we want to do the same for our drive/partition, we will need to edit the fstab file and add an entry for our drive.
To do so, the first thing that we need is the UUID of our drive.
Open a terminal window (also called tty or console) and type in:
1
lsblk -f
Note down the UUID of the drive or partition that you want automatically mounted on boot.
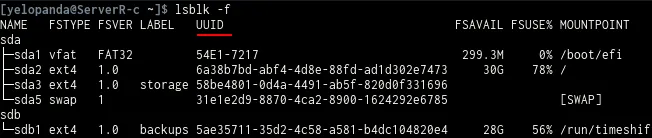 You can identify the drive either by size, file system type, or mount point. Now we have the uuid we can proceed to next step, that is adding an entry in the fstab file.
Adding an entry in the fstab file
Open the fstab file in any editor of your choice, it is located in /etc/fstab. I am going to use nano to do so, if you want to follow, open a terminal window and type:
1
sudo nano /etc/fstab
Remember, you will need admin privileges (or sudo) to edit this file.
Next, at the end of fstab, on a new line, paste this:
1
UUID=xxxxxxxxxx /mnt/mydrive ext4 defaults 0 2
UUID=xxxxxxxxxx : as expected, uuid of your drive goes here.
/mnt/mydirve : it is the location where your drive/partition will be mounted.
ext4 : this represents the file system (ntfs, fat32, etc.) of your drive, in my case it is ext4.
defaults : this will grant you basic permissions over your drive.
0 : this represents the value of the dump, we don’t need it in this case it is set to 0.
2 : this is the value of pass, 0 means no fscheck, 1 is usually set for drives that we need to boot from, and 2 for other disks.
Now save the file with Ctrl+o or Ctrl+s and you are done. The next time you boot your computer, your drive will be automatically mounted at the specified location.
Auto Mount Drive at boot using gnome-disks
Gnome Disks is an GUI disk utility for Linux. It is an easy-to-use disk utility that we can use to auto mount a disk if you are not comfortable using a terminal.
On Ubuntu, Gnome Disks comes pre-installed. If not installed on your system, simply open a terminal window and type in:
For Ubuntu/Debian and their Derivatives:
1
sudo apt install gnome-disk-utility
And if using Arch Linux or its derivatives:
1
sudo pacman -S gnome-disk-utility
You can also install it via searching for ‘Gnome Disks’ in your Linux Distribution’s GUI package manager like Software Center in Ubuntu & Discover in KDE Plasma.
1. Open the Gnome disks app either from your app drawer or typing in gnome-disks in a terminal window.
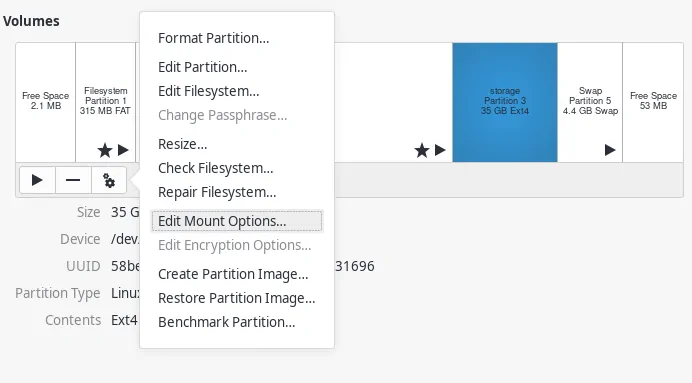
2. Now select the partition that you want to auto mount.
3. Once the partition is highlighted, click on the low little gears and select ‘Edit Mount Options‘.
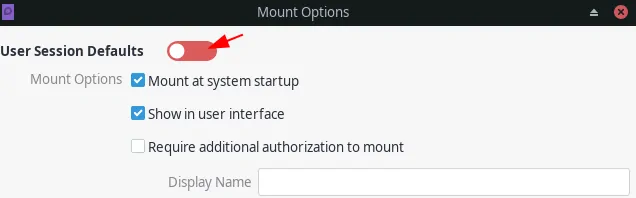
 4. From there, turn off the ‘User session defaults’ is toggled off and the option ‘Mount at system startup‘ is ticked. Click Ok to save the changes that we just made.
 5. Once done, your drive will get auto-mounted every time you boot your system.
(Note: The drive will not be already mounted after doing the steps above, reboot your system for changes to take effect.)
Making a partition Writable
While it is not so common but in some cases if you have just partitioned a new drive, it can give you a Read-only Drive error every time you try to copy data onto it.
In order to fix this, we need to change the drive’s ‘Write’ permissions. To do s, open up a terminal window and type:
1
sudo chmod ugo+wx /path/to/your/drive
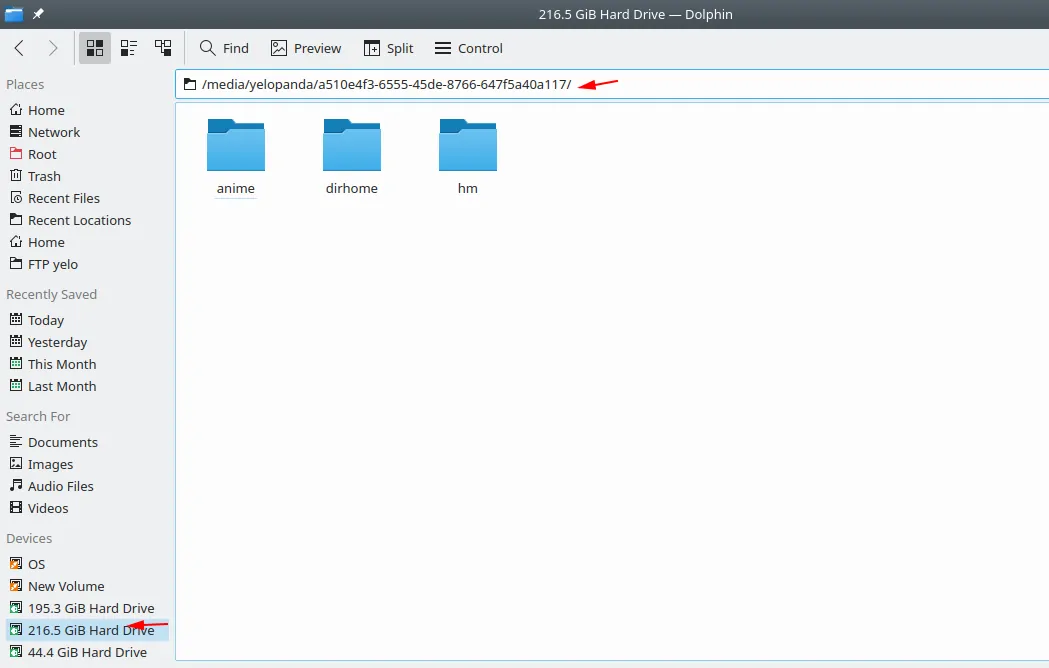
Replace path/to/your/drive with the actual mount path of your drive. To find your drives mount location, open a file manager, click on the drive to mount it and then you can copy its path.
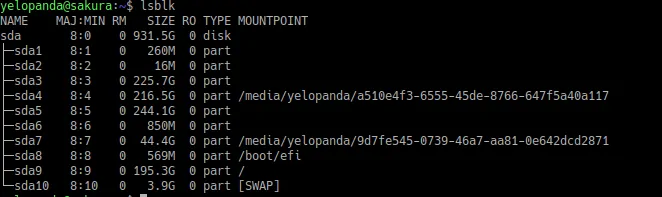
 If you want to use a terminal, make sure that the drive is mounted and then type in:
1
lsblk
Output will be similar to this:
Conclusion
This concludes my post on how to auto mount a drive/partition on boot in Linux
If you have any suggestion, questions, regarding this guide do leave a comment down below. You can also comment if you are facing any problems following the guide, I will get back to you ASAP.
If you are interested in drive encryption, check this post on How to Encrypt your Drive in Linux (and if it is worth it or not).